Using table storage in Typescript
For those that don’t know table storage, it is a key value store that you can use it in Azure. The basic thinking that I have when using table storage is. Are you spending a lot of money on Redis but your requests don’t need to be < 1ms and you would be ok with that taking around 50ms, so table storage it is probably for you.
You can get really good instructions on how to use table storage using javascript on the docs but trying to do the same using Typescript proved to be a bit more challenging.
How cheap it is Table storage
There is this amazing article by Troy Hunt showing how he builds ’;–have I been pwned? using table storage. This was back in 2013 and he was spending $5 to store and query 154MM records.
Today table storage has evolved even more and it is still cheap. You can get information about price here fit just as an example where the storage cost it is just £0.0522 per GB 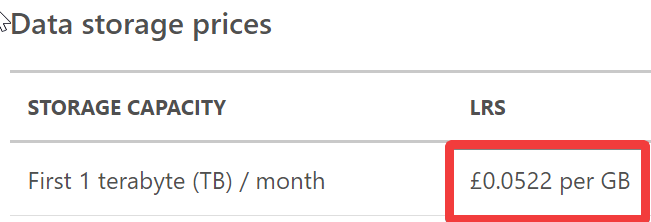 and the cost to query it is
  £0.000369 for every 10k transactions.
Just making one simple example if you would store the name, email, id and address (around 250 bytes) for every single person in UK (around 70 million now) and query that 10 times per second for one month (25920000 queries) it would cost you £1.55 per month.
How to use it in typescript
Pre requisits
Starting the project
navigate to your project folder and do
npm init -y
npm i typescript @types/dotenv --save-dev
npm i azure-storage dotenv --save
tsc --init
Now you should create a file called index.ts ( I am using VSCode as my editor but you can use what you think it is easier):
import * as storage from "azure-storage"

console.info(storage);
This should output to you information about the storage library. ok, now we have everything loaded let’s start playing with it.
Connecting to the table
The first thing that you will need to do it is to connect to the table.
To connect to the table you will need to create a storage connection you can get your storage connection in the Azure portal 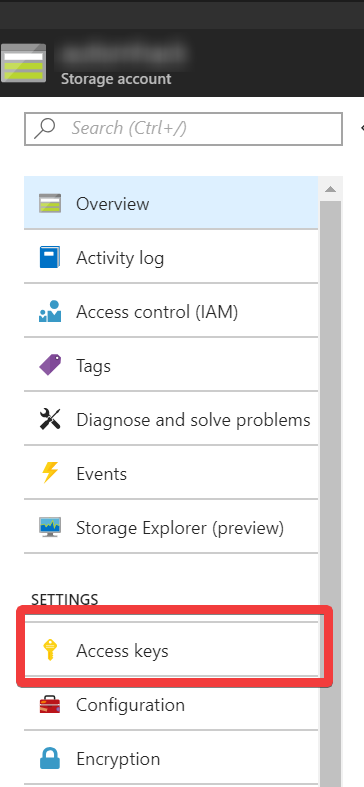
Storing the secret
We are going to be using environment variables to store the connection strings. To develop local I strongly suggest you use dotenv it makes using environment variables way easier locally and moves that across projects.
You need to create one file called .env and add the connection string that you got in the previous step here:
AZURE_STORAGE_CONNECTION_STRING="YouConnectionStringValueHere"Mine one end up looking like this:
AZURE_STORAGE_CONNECTION_STRING="DefaultEndpointsProtocol=https;AccountName=MYACCOUNT;AccountKey=MYSECRET;EndpointSuffix=core.windows.net"Creating the table
Now we need to load our environment file and connect to storage, so changing the index.ts file:
import * as storage from "azure-storage"
import * as dotenv from "dotenv";

dotenv.load();

const storageClient = storage.createTableService();
You don’t need to specify the connection string because by default the library look for the environment variable called AZURE_STORAGE_CONNECTION_STRING
Now we need to create the table in case it is not available to present:
import * as storage from "azure-storage"
import * as dotenv from "dotenv";

dotenv.load();

const storageClient = storage.createTableService();
const tableName = "sampletable";
storageClient.createTableIfNotExists(tableName,(err, result) => {
    if(err) throw err;
    console.info(result);
});
Now you can execute the code in the console using:
tsc | node ./index.jsNow you should have your table created in tour storage account.
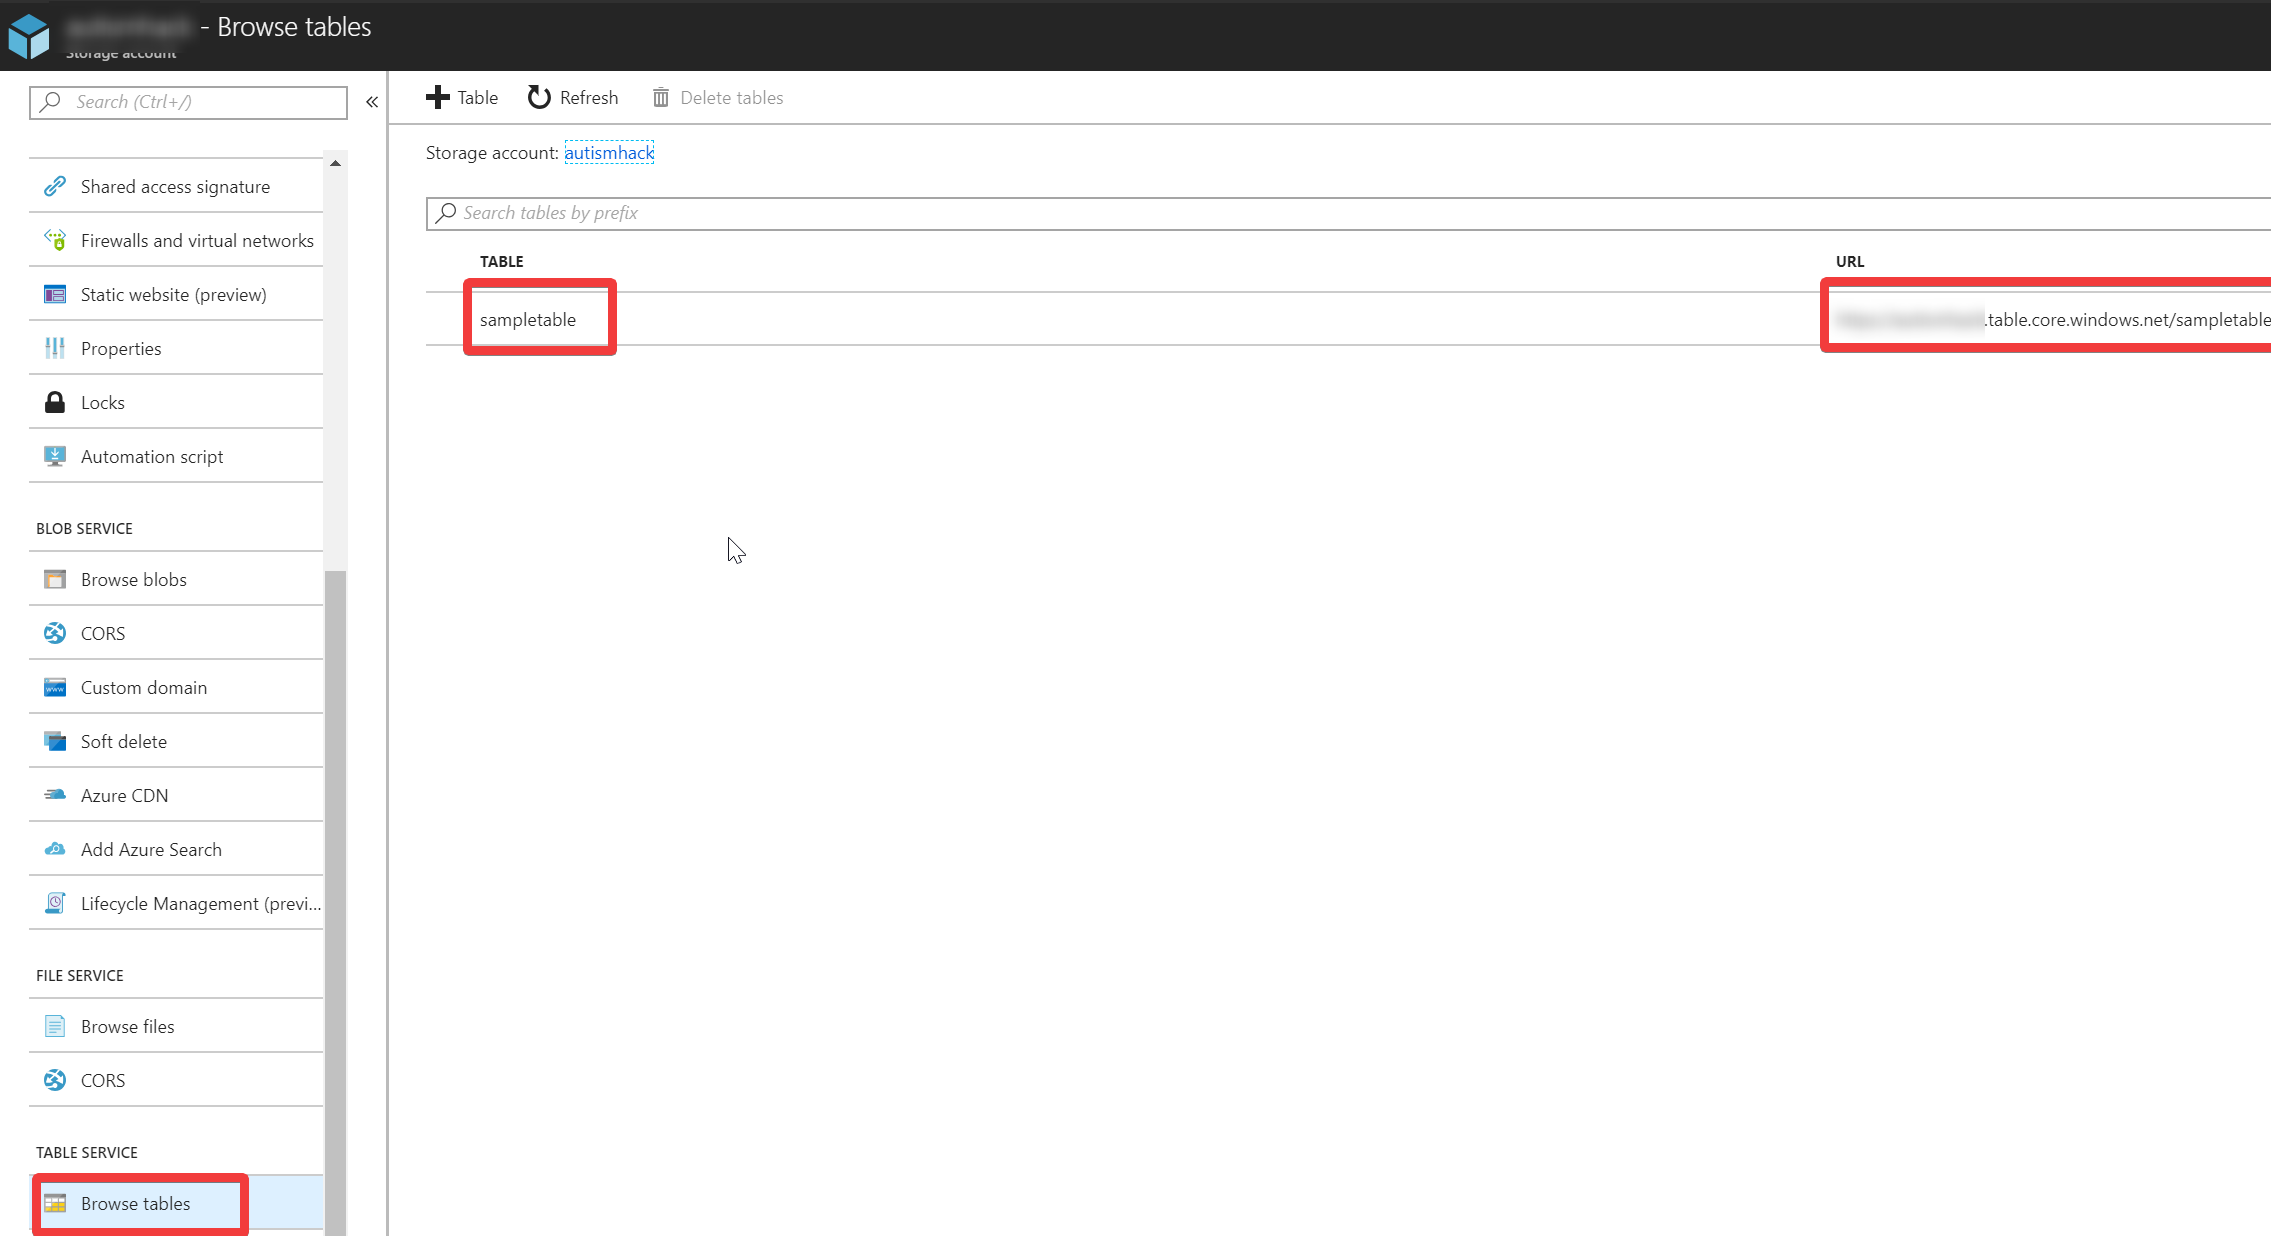 { margin: 0 auto}
Making it more typescript friendly
Now that we are connecting to the database lets make it easier to use it and something closer to what you would expect working with modern libraries.
First, let’s create the storage class storage.ts
import * as storage from "azure-storage"
import * as dotenv from "dotenv";

dotenv.load();

export class Storage{
    private tableService : storage.TableService;
    private tableName: string = "default";
    private constructor() {
        this.tableService = storage.createTableService();
    }
    static async Create(tableName: string) : Promise<Storage> {
        var me = new Storage()
        me.tableName = tableName;
        await me.CreateIfDoesntExistTable();
        return me;
    }
    private async CreateIfDoesntExistTable() : Promise<storage.TableService.TableResult> {
        return new Promise((resolve, reject) =>{
            try {
                this.tableService.createTableIfNotExists(this.tableName, (err,result) => {
                    if(err) throw err;
                    resolve(result);
                });
            } catch (err) { reject(err); }
        })
    }
}
Ok, I know that this is a lot to take just once. We kept the same imports from index.ts. Now we are creating the storage class to abstract the calls to the storage
First, we are initiating the table service in the constructor since this is a process that does not execute or have any external dependency meaning that it is ok to put that in the constructor.
private constructor() {
    this.tableService = storage.createTableService();
}
We kept that constructor private since we don’t want someone to initiate the Storage class without a table name.
Since to create a table it is required a call to an external dependency we create a “factory” for it so we are using the static method create as a way of doing that and on it, we make sure that the table it is created.
static async Create(tableName: string) : Promise<Storage> {
    var me = new Storage()
    me.tableName = tableName;
    await me.CreateIfDoesntExistTable();
    return me;
}
The Azure storage library does not support Promises yet instead it uses call back but not only that some of the errors in the library are not thrown back in as callback errors but as actual errors in your javascript execution (invalid table name, for example, would not come back as a callback error)
So in order to make the request resembling a more modern typescript ( and javascript), we encapsulate that in one async method
private async CreateIfDoesntExistTable() : Promise<storage.TableService.TableResult> {
        return new Promise((resolve, reject) =>{
            try {
                this.tableService.createTableIfNotExists(this.tableName, (err,result) => {
                    if(err) throw err;
                    resolve(result);
                });
            } catch (err) { reject(err); }
        })
    }
Now it is time to change back our index.ts but before that, since we are going to be working with async new we need to change our tsconfig.json we need to tell typescript that we are going to be targeting es6 or later so on the "target": "es5", in the tsconfig.json file change it to "target": "es6", that way you can use the async keyword
Them changing the index.ts to look like this:
import { Storage } from "./storage";

const tableName = "sampletable";

(async () => {
  await Storage.Create(tableName);
  console.log("Table created");
})();
As you can see we remove all the imports now to use only our storage class and change out initialization to use one async “hack”:
(async => { })()It is an easy way to create one async method that executes after created.
Now we just need to call out factory method await Storage.Create(tableName); to guarantee that our table it is created.
Now you can execute the code again in the console using:
tsc | node ./index.jsInserting your first entities
Now that we have the table created and can connect to it time to insert some resources on it.
let’s change first and add a new method on our storage.ts to the Storage class
async AddOrMergeRecord(record: ITableEntity): Promise<ITableEntity> {
    return new Promise((resolve, reject) => {
        try {
        const tr = this.convertToTableRecord(record);
        this.tableService.insertOrMergeEntity(this.tableName, tr, err => {
            if (err) throw err;
            resolve(record);
        });
        } catch (err) {
        reject(err);
        }
    });
}
Again we are using the same technic to convert the insertOrMergeEntity to be using promise instead of the callback.
This method should be failing now because there are 2 things we need to add because of the way that objects are stored in table storage. In table storage a property it is always one object with 2 properties $ and _ being $ the type to be stored and _ the value to be stored. More than that another thing that you can see it is that the method accepts only ITableEntity this happens because we need to guarantee that the properties of PartitionKey and RowKey are strings and present in every single object that we need to insert.
So let’s add the code to make this work first we are going to add the interface of ITableEntity after the last line of our storage.ts
export interface ITableEntity {
    PartitionKey?: string;
    RowKey?: string;
    [key: string]: string | number | boolean | undefined;
}
You are just requesting an object to have this 2 properties the [key: string]: string | number | boolean | undefined; allow the object to have any other property of the types supported by table storage.
Now we need to write the code to convert the ITableEntity in something that it is supported by table storage fortunately for us there is a utility helper built-in into the library.
We are going to add the missing method in the Storage class in the storage.ts
private convertToTableRecord(entity: ITableEntity) {
    let result: any = {};
    Object.keys(entity).forEach(k => {
      let prop = Object.getOwnPropertyDescriptor(entity, k);
      if (prop) {
        result[k] = new storage.TableUtilities.entityGenerator.EntityProperty(
          prop.value
        );
      }
    });
    return result;
}
The important line here to look at it is the storage.TableUtilities.entityGenerator.EntityProperty that will transform a value of any type in a value following the needs for the storage library.
Time to change our index.ts
The new code should be something like this:
import { Storage } from "./storage";

const tableName = "sampletable";

(async () => {
  const storage = await Storage.Create(tableName);
  await storage.AddOrMergeRecord({
    PartitionKey: "SamplePartition",
    RowKey: "SampleRow",
    SampleInt: 42,
    SampleString: "Amazing!"
  });
  console.log("Record added");
})();
As you can see we only added the AddOrMergeRecord you can add as many properties as you want.
Now to execute again:
tsc | node ./index.jsYou should have your first record inserted into the table.
Quering entities entities
There are multiple ways to query the table storage the most common being retrieve a single row by Partition and Row Id.
Let’s add this functionality first
Again in our storage.ts let’s add a method to query by both this value.
async GetRecord(partitionKey: string, rowKey: string): Promise<ITableEntity> {
    return new Promise<ITableEntity>((resolve, reject) => {
      this.tableService.retrieveEntity<ITableEntity>(
        this.tableName,
        partitionKey,
        rowKey,
        (err, entity) => {
          if (err) throw err;
          resolve(entity);
        }
      );
    });
  }
Again we are using the same strategy of covering a method in something that can be used as a Promise to a more modern javascript way of programming but not that many changes from the method itself.
Lets change the index.ts to use this query. Just include after inserting the entity the following code:
const record = await storage.GetRecord("SamplePartition", "SampleRow");
console.info(record);
Now if you compile again (tsc) and run (node ./index.js) you will see the entity being returned but not exactly what you expected.
You are getting somethign like:
{ PartitionKey: { '$': 'Edm.String', _: 'SamplePartition' },
  RowKey: { '$': 'Edm.String', _: 'SampleRow' },
  Timestamp: { '$': 'Edm.DateTime', _: 2018-07-08T19:28:12.574Z },
  SampleInt: { _: 42 },
  SampleString: { _: 'Amazing!' },
  '.metadata':
   { metadata:
      'https://xxx.table.core.windows.net/$metadata#sampletable/@Element',
     etag: 'W/"datetime\'2018-07-08T19%3A28%3A12.5744502Z\'"' } }
That it is not what an object of javascript should look like. so let’s get back to our javascript and convert the results in something more javascript like.
The same way that we created the convertToTableRecord we are going to create now the tableRecordToJavacript method as a private method in the Storage class.
private tableRecordToJavacript(entity: ITableEntity): ITableEntity {
    let result: any = {};
    Object.keys(entity).forEach(k => {
      // we do not want to decode metadata
      if (k !== ".metadata") {
        let prop = Object.getOwnPropertyDescriptor(entity, k);
        if (prop) {
          result[k] = prop.value["_"];
        }
      }
    });
    return result;
  }
Now we just need to change the GetRecord method to use the private method:
async GetRecord(partitionKey: string, rowKey: string): Promise<ITableEntity> {
    return new Promise<ITableEntity>((resolve, reject) => {
      this.tableService.retrieveEntity<ITableEntity>(
        this.tableName,
        partitionKey,
        rowKey,
        (err, entity) => {
          if (err) throw err;
          resolve(this.tableRecordToJavacript(entity));
        }
      );
    });
  }
Now when you execute you should get the expected result.
{ PartitionKey: 'SamplePartition',
  RowKey: 'SampleRow',
  Timestamp: 2018-07-08T19:54:49.427Z,
  SampleInt: 42,
  SampleString: 'Amazing!' }
Going forward
Over the next blog posts, I hope to explore more query options and how to query for strings and ranges in table storage.
You can find step by step of the instructions in this GitHub repo. https://github.com/Nepomuceno/typescript-azure-storage/
Each one of the steps can be download individually in the release page